How To Create A Website Using Hawkhost

How To Create A Website Using Hawkhost
If you’re looking for an easy way to get your website online, choosing the right hosting matters a lot. Hawkhost is a popular option because it offers straightforward hosting services, solid performance, and tools you can use even if you’re not a developer. In this guide, I’ll walk you through how to create a website using Hawkhost—from picking a plan to publishing your pages—so you can go live with confidence.
What you’ll need before you start
Before you sign up and begin, it helps to have everything ready. At minimum, you’ll want:
- A domain name (like
yourbusiness.com) - A hosting plan from Hawkhost
- A website idea or files (WordPress content, HTML files, or a site builder plan)
If you don’t already have a domain, you can usually purchase one during or after signup. If you already have a domain, you’ll simply point it to your Hawkhost hosting later.
Step 1: Choose a Hawkhost hosting plan
Start by visiting Hawkhost and selecting the type of hosting that matches what you want to build:
- Shared hosting is typically best for small websites, blogs, and personal projects.
- WordPress hosting (if available in your plan) is ideal if you want to build with WordPress.
- Other options may be available depending on your needs (for example, performance-focused setups).
When choosing, consider:
- How much traffic you expect initially
- Whether you want to use WordPress
- Your technical comfort level
- Your budget for monthly hosting
A good approach: start with the plan that fits your current needs, then upgrade later if you outgrow it.
Step 2: Sign up and set up your hosting account
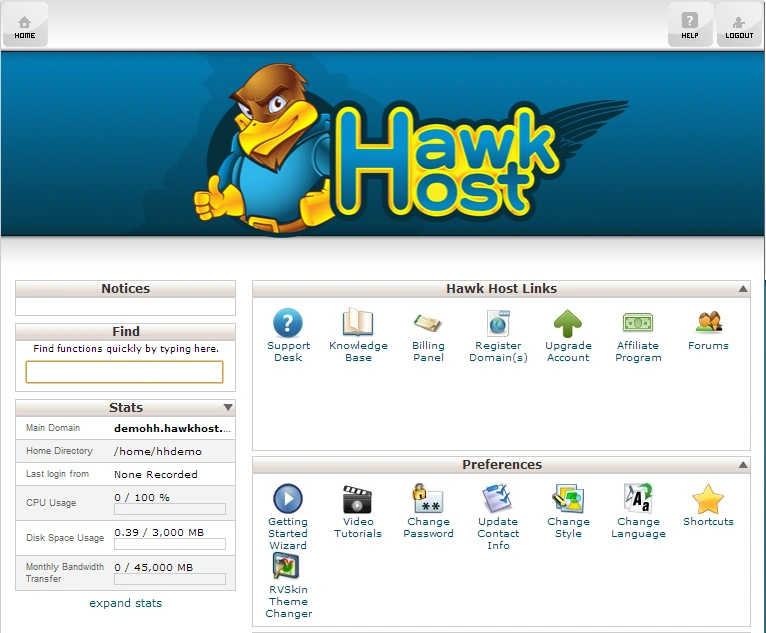
After selecting a plan, complete the signup process. You’ll receive access details for your hosting dashboard or control panel. Depending on the Hawkhost setup, you may have access to tools for managing:
- Domains
- Email accounts
- Databases (important for CMS sites like WordPress)
- Files and hosting settings
Take a few minutes to locate your key information:
- Control panel login
- Nameservers or server connection details (if provided)
- Account-level details like hosting directory paths
Keeping these handy makes the next steps faster.
Step 3: Connect your domain to Hawkhost
To make your website accessible, your domain must point to your hosting account.
Option A: Use Hawkhost with a new domain
If you purchased your domain through Hawkhost (or the integration is available), it may connect automatically or through an easy setting in your dashboard.
Option B: Point an existing domain to Hawkhost
If you already own your domain, you’ll need to update its DNS records at your domain registrar.
Typically, you will either:
- Update your nameservers, or
- Add A records / CNAME records
Most users find nameserver updates simplest. Once changed, DNS propagation can take time—sometimes minutes, sometimes up to 24–48 hours depending on your provider.
Tip: If your site isn’t showing yet, double-check that the DNS changes are complete and that you’re using the correct host settings from Hawkhost.
Step 4: Install your website platform (WordPress or static site)
Now comes the “build” part. You have a few paths, depending on how you want your site to work.
If you want WordPress
WordPress is one of the easiest ways to create and manage a website. Many hosts provide one-click installs, which save you from manually creating databases and configuring settings.
Look for options like:
- “Softaculous,” “Fantastico,” or an “Auto Installer” (names vary)
- “WordPress Installer”
- A “Create Application” button in the control panel
When installing WordPress, you’ll usually specify:
- Domain where WordPress will be installed
- Site directory (leave this blank for the root site, unless you want a subfolder)
- Admin username and password
- Database details (often handled automatically)
Once installed, you can log into WordPress and start customizing your theme, pages, and content.
If you want a simple HTML/CSS website
If you prefer a lightweight site (like a portfolio or landing page), you can upload static files directly.
The typical process is:
- Create your website files locally (HTML/CSS/JS and images)
- Upload them to your hosting account’s public web directory (often
public_html) - Confirm the default file is named correctly (commonly
index.html)
To upload files, you may use:
- A file manager inside the control panel
- FTP/SFTP using login credentials
If you want a site builder
Some hosts support integration with website builders. If Hawkhost offers one in your plan/control panel, it can reduce technical steps. You’ll still need to connect the domain and publish once you’re ready.
Step 5: Configure basic website settings
Regardless of platform, you’ll want to handle a few fundamentals early:
- Website title and tagline (especially in WordPress)
- Permalinks (WordPress should usually use “Post name” for cleaner URLs)
- SEO basics like page titles and descriptions
- Timezone and language
- SSL/HTTPS so your site loads securely
Enable SSL (HTTPS)
A modern website should use HTTPS. Many hosts provide free SSL certificates and make activation simple. Check your Hawkhost dashboard for an SSL option or “Let’s Encrypt” integration.
Once enabled, test your site:
- Does the browser show the padlock?
- Do links redirect to
https://instead ofhttp://?
Step 6: Upload content and design your pages
This is where your website becomes more than just a live folder of files.
For WordPress
- Pick a theme that matches your brand and type of site.
- Create core pages like:
- Home
- About
- Services (or Products)
- Contact
- Add content pages and blog posts if you plan to publish regularly.
- Install essential plugins only when needed, such as:
- SEO plugin
- Contact form plugin
- Caching/performance (if recommended)
- Security plugin
Try not to overload your site with dozens of plugins—too many can slow things down.
For static websites
You’ll upload:
- Your HTML files
- Stylesheets
- Images and scripts
- Any additional pages (e.g.,
about.html,contact.html)
Make sure links between pages work correctly, especially if you use relative paths.
Step 7: Set up email (optional, but common)
Many people want professional email addresses like [email protected]. If Hawkhost offers email hosting, you can create accounts in the control panel and then connect them to services like:
- Webmail (hosted)
- Gmail/Outlook via IMAP/SMTP
If you’re planning to use email, consider:
- Creating SPF/DKIM records (helps with deliverability)
- Using a consistent naming scheme for addresses
This step is optional, but it’s often important for businesses.
Step 8: Test your website before going live fully
Before sharing your website widely, do a quick test:
- Check it in multiple browsers (Chrome, Firefox, Safari)
- Test on mobile and desktop
- Click through menus and buttons
- Submit any forms on the page
- Verify contact emails go through
- Test page load speed (especially for image-heavy pages)
If something looks off, you can usually correct it quickly—hosting setups make revisions straightforward.
Step 9: Publish and maintain
Once your website is working:
- Keep WordPress updated (if using it)
- Update themes/plugins safely
- Back up your site regularly
- Monitor uptime and storage limits
Maintenance is the difference between a website that stays healthy and one that slowly becomes outdated or vulnerable.
Pros and Cons of using Hawkhost
Pros
- Beginner-friendly setup: If the control panel provides installers, getting a site live is much easier.
- Good performance potential: Many users choose Hawkhost for speed and reliability.
- Flexible website options: You can build with WordPress or upload static content depending on your preference.
- Support for common tasks: Domain connection, file management, and SSL setup are typically manageable through the dashboard tools.
Cons
- You still need to handle setup details: Connecting domains, enabling SSL, and configuring DNS can be confusing if you’re brand new.
- Plan limitations may apply: Depending on the plan, resources like storage or performance tuning may be more restricted.
- Maintenance depends on your platform: If you use WordPress, ongoing updates are required to keep the site secure.
Quick guide checklist (so you don’t miss anything)
Use this simple checklist while you build:
- Pick a Hawkhost hosting plan
- Sign up and log into your control panel
- Point your domain to Hawkhost (DNS or nameservers)
- Install WordPress (optional) or upload your site files
- Enable SSL/HTTPS
- Create core pages and add content
- Test everything on mobile and desktop
- Add email (optional)
- Keep backups and updates going regularly
Getting your site online with Hawkhost doesn’t have to be complicated
Creating a website is much more approachable
🚀 Sign Up for hawkhost
Register for hawkhost here to receive a “lifetime discount” of up to 20%