How To Activate Hawkhost Hosting Account

How To Activate Hawkhost Hosting Account
Getting your web hosting account up and running is usually straightforward—but the exact steps can vary depending on how you purchased your Hawkhost plan and what information you already have (domain name, payment status, etc.). In this guide, I’ll walk you through the typical process to activate a Hawkhost hosting account, what to check if activation doesn’t complete right away, and how to verify that everything is working.
What you should have before activating your hosting
Before you start, it helps to gather a few basics so you don’t get stuck mid-process:
- Your Hawkhost account credentials (email + password, or the username you used during signup)
- Your order details (plan name or invoice information, if available)
- Domain information (whether you’re using an existing domain or will connect a new one later)
- Access to your email inbox used during purchase (for any activation or verification messages)
If you purchased hosting and also registered a domain through Hawkhost, activation may look slightly different than if you’re connecting an external domain.
Step-by-step: Activate your Hawkhost hosting account
1) Log in to your Hawkhost client area
Start by going to the Hawkhost website and opening the client area (sometimes called the billing/customer portal). Log in using the credentials you received during signup.
If you can’t log in:
- Use the “Forgot password” option (if available)
- Check spam/junk folders for any emails from Hawkhost
- Confirm you’re using the correct email address tied to your purchase
2) Locate your hosting order in the dashboard
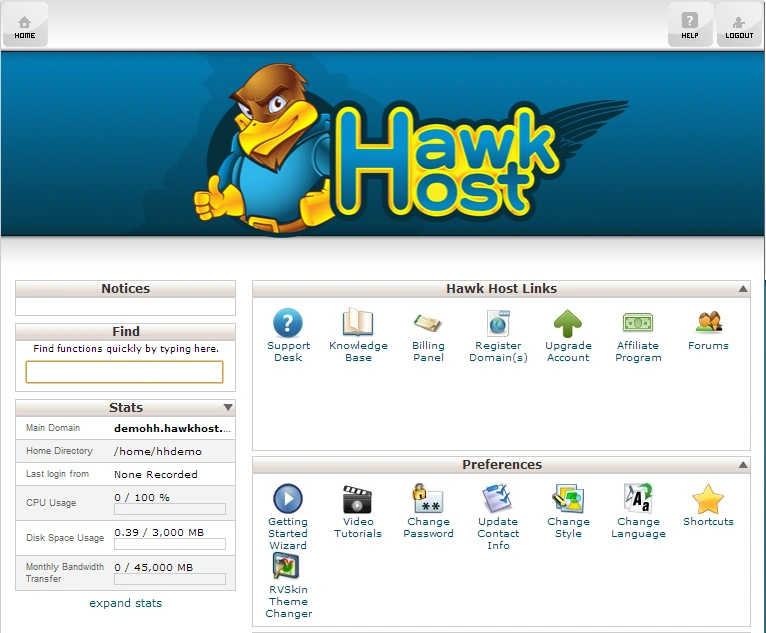
Once logged in, you should see your active services or an overview of your account. Look for:
- Your hosting package
- Any status indicators (for example: pending, active, or awaiting confirmation)
- Links to manage, view details, or service information
Depending on your plan, you may also see an option like “Activate,” “Provision,” or “Set up.”
3) Confirm your billing status (common reason for delays)
If your service appears to be “pending” or not yet active, the most common cause is that payment hasn’t fully cleared or your payment hasn’t been processed correctly.
Double-check:
- Whether your invoice is marked as paid
- Whether there are any unpaid or failed payment notices
- Whether additional verification is required
If something is incomplete, wait a few minutes and refresh, or contact Hawkhost support with your invoice/order number so they can review it quickly.
4) Trigger/complete provisioning (if your plan requires it)
Some hosting providers activate resources automatically after payment, while others require provisioning to be completed. If you see a button or link to finalize setup:
- Click the option to activate or provision the hosting
- Wait for the system to finish building your hosting environment
This usually takes only a short time, but in some cases it may take longer depending on system load.
5) Check your hosting access details
After activation, you should receive or be able to view key details such as:
- Control panel access (often via cPanel or a similar dashboard)
- FTP/SFTP credentials
- Nameserver information (crucial for connecting the domain)
- Any database setup details if your account includes them
In many cases, Hawkhost will show these under the hosting service settings or “Manage Service” area.
Connecting your domain (nameservers) after activation
Activating the hosting account is only half the job—your domain also needs to point to your new server.
1) Find your Hawkhost nameservers
Inside your account service details, locate your assigned nameservers. They’ll typically look something like:
ns1.yourhost.comns2.yourhost.com(Exact values will vary.)
2) Update DNS at your domain registrar
Go to the website where your domain is registered (this could be Hawkhost or a separate registrar like Namecheap, GoDaddy, etc.). Then update the DNS settings:
- Choose Nameserver or DNS Management
- Replace existing nameservers with the Hawkhost ones you found
- Save changes
3) Wait for DNS propagation
After updating nameservers, DNS changes can take time to propagate globally. This often happens within a few hours, but it can sometimes take up to 24–48 hours.
During this window, your website may appear intermittently accessible depending on your location and caching.
Verify everything is working
Once your hosting is activated and DNS is updated, verify that your setup is correct.
1) Access your control panel
Try logging into your hosting control panel (if provided). If you can access it successfully, your server-side provisioning is likely completed.
2) Check that DNS is pointing correctly
If you want quick confirmation, you can use a DNS check tool online (or Hawkhost support may provide guidance). Make sure your domain resolves to the correct server.
3) Test website delivery
Try visiting your domain in a browser. If you’re setting up a fresh site, you may see a default page or a holding page until you upload your files or install your CMS (like WordPress).
Common issues and what to do
“My account is not active yet”
If you can log into the client area but your hosting service status isn’t active:
- Check invoice/payment status
- Confirm you completed the purchase successfully
- Wait a short period (sometimes provisioning happens shortly after payment)
- Contact Hawkhost support with your order ID if it remains pending
“I activated it, but my domain doesn’t load”
This usually points to a DNS issue:
- Nameservers weren’t updated correctly
- You updated DNS at the wrong registrar account
- Propagation hasn’t finished yet
Double-check the nameservers and give it time.
“I can’t access FTP or the control panel”
If the account is active but access fails:
- Confirm you’re using the correct username/password
- Check whether credentials were provided under the service details
- Reset credentials if the system offers that option
- Contact support if access is still denied (it may be a provisioning or permissions issue)
Pros / Cons
Pros
- Straightforward activation flow through the client area once payment and provisioning are complete.
- Clear account management: you can typically find service details, control panel access, and DNS info in one place.
- Flexible setup: you can host a new site or connect an existing domain after activation.
Cons
- DNS propagation delays can make it feel like activation didn’t work even when the server is ready.
- If provisioning requires manual steps, activation may not happen instantly after checkout.
- If you’re new to hosting, the domain/DNS part can be confusing until you understand nameservers.
A quick activation checklist
Before you assume anything is broken, use this simple checklist:
- Logged in to Hawkhost client area successfully
- Confirmed your hosting order is marked active (or provisioning completed)
- Retrieved control panel, FTP, and other access details
- Updated your domain nameservers to the Hawkhost values
- Waited for DNS propagation
- Verified the website loads and the control panel is accessible
Getting started after activation
Once your account is active and your domain points correctly, your next steps usually include:
- Uploading your website files (via FTP/SFTP or file manager)
- Installing WordPress or another CMS (if you want a content-driven site)
- Creating databases (if needed) and configuring your site settings
- Setting up email records (MX/SPF/DKIM) if you plan to use hosted email
If you tell me what type of site you’re building (WordPress, HTML/CSS, eCommerce, etc.) and whether your domain is registered through Hawkhost or elsewhere, I can suggest the most efficient next steps.
If you want, share what stage you’re stuck at (e.g., “payment is pending,” “nameservers aren’t updating,” or “control panel login fails”), and I’ll help you troubleshoot it.
🚀 Sign Up for hawkhost
Register for hawkhost here to receive a “lifetime discount” of up to 20%